Automate Proxmox VMs with Cloud-Init
In my previous post, I showed how to provision VMs with NoCloud. That works great, but there’s an even faster approach: storing your cloud-init config directly in Proxmox’s snippets folder and referencing it with –cicustom. Automate Proxmox VMs with Cloud-Init method is cleaner, more manageable, and scales better when you’re provisioning multiple VMs with similar…
In my previous post, I showed how to provision VMs with NoCloud. That works great, but there’s an even faster approach: storing your cloud-init config directly in Proxmox’s snippets folder and referencing it with --cicustom.
Automate Proxmox VMs with Cloud-Init method is cleaner, more manageable, and scales better when you’re provisioning multiple VMs with similar configurations.
The Advantage of -cicustom
Instead of generating ISOs for each cloud-init config, you:
- Store YAML templates in Proxmox
- Reference them by path when cloning VMs
- Reuse the same config across multiple clones
- Easily update configurations in one place
Let’s walk through it.
Download the Cloud Image
SSH into your Proxmox server and download the latest Ubuntu 24.04 cloud image:
cd /var/lib/vz/template/iso
wget https://cloud-images.ubuntu.com/releases/noble/release/ubuntu-24.04-server-cloudimg-amd64.img
Verify the download:
ls -lah /var/lib/vz/template/iso/ | grep ubuntuYou should see the ubuntu-24.04-server-cloudimg-amd64.img file listed.
Create the VM Template
Create the base VM template that you’ll clone from:
qm create 501 \
  --name ubuntu-template \
  --memory 2048 \
  --cores 4 \
  --net0 virtio,bridge=vmbr0 \
  --scsihw virtio-scsi-pci \
  --ostype l26 \
  --agent enabled=1 \
  --vga serial0 \
  --serial0 socket
--ostype l26– Tells Proxmox this is a Linux VM
--agent enabled=1– Enables QEMU guest agent
Optional (Nice to have):
--vga serial0and--serial0 socket– Enable serial console access.
This lets you watch cloud-init progress in real-time in the Proxmox console. Can be omitted if you don’t need to monitor boot output.
Import the cloud image disk:
qm set 501 --scsi0 local-zfs:0,import-from=/var/lib/vz/template/iso/ubuntu-24.04-server-cloudimg-amd64.imgThis imports the cloud image (~3.5GB). You need to resize the disk to provide adequate space for cloud-init
Resize the disk after import:
qm resize 501 scsi0 +60GAttach the cloud-init disk:
qm set 501 --ide2 local-zfs:cloudinitSet boot order:
qm set 501 --boot order=scsi0Convert to a template:
qm template 501Now you have a reusable Ubuntu template in Proxmox. All future clones will inherit this configuration.
Create Your Cloud-Init YAML
SSH into your Proxmox server and create the snippets folder:
cd /var/lib/vz/snippets
nano cloud-init-config.yaml
Paste your cloud-init configuration. Here’s a production-ready example that includes SSH hardening, QEMU Guest Agent, Fail2Ban, UFW firewall, and Docker:
#cloud-config
users:
  - name: kaf <-- Swap this with your own username
    groups: users, admin, docker
    sudo: ALL=(ALL) NOPASSWD:ALL
    shell: /bin/bash
    ssh_authorized_keys:
      - ssh-ed25519 AAAAC3NzaC1lZDI1NTE5AAAAI... <-- Your public ssh key here

packages:
  - fail2ban
  - ufw
  - ca-certificates
  - curl
  - gnupg
  - lsb-release
  - qemu-guest-agent

package_update: true
package_upgrade: true

write_files:
  - path: /etc/ssh/sshd_config.d/ssh-hardening.conf
    content: |
      PermitRootLogin no
      PasswordAuthentication no
      Port 22
      KbdInteractiveAuthentication no
      ChallengeResponseAuthentication no
      MaxAuthTries 2
      AllowTcpForwarding no
      X11Forwarding no
      AllowAgentForwarding no
      AuthorizedKeysFile .ssh/authorized_keys
      AllowUsers kaf <-- Swap this with your own username

  - path: /etc/docker/daemon.json
    content: |
      {
        "log-driver": "json-file",
        "log-opts": {
          "max-size": "10m",
          "max-file": "3"
        }
      }

runcmd:
  # Fail2Ban setup
  - printf "[sshd]\nenabled = true\nport = ssh, 22\nbanaction = iptables-multiport" > /etc/fail2ban/jail.local
  - systemctl enable fail2ban
  - systemctl start fail2ban

  # UFW Firewall
  - ufw allow 22/tcp
  - ufw allow 80/tcp
  - ufw allow 443/tcp
  - ufw enable

  # Docker Installation (Docker v29 - DEB822 format)
  - mkdir -p /etc/apt/keyrings
  - curl -fsSL https://download.docker.com/linux/ubuntu/gpg -o /etc/apt/keyrings/docker.asc
  - chmod a+r /etc/apt/keyrings/docker.asc
  - |
    tee /etc/apt/sources.list.d/docker.sources > /dev/null <<EOF
    Types: deb
    URIs: https://download.docker.com/linux/ubuntu
    Suites: $(. /etc/os-release && echo "${UBUNTU_CODENAME:-$VERSION_CODENAME}")
    Components: stable
    Signed-By: /etc/apt/keyrings/docker.asc
    EOF
  - apt-get update
  - apt-get install -y docker-ce docker-ce-cli containerd.io docker-buildx-plugin docker-compose-plugin

  # Enable Docker daemon
  - systemctl enable docker
  - systemctl start docker

  # Add user to docker group
  - usermod -aG docker kaf <-- Swap this with your own username
Save the file (in nano: Ctrl+X, then Y, then Enter).
Clone Your VM Template
Now clone your pre-built template (from the NoCloud article) and reference the cloud-init YAML:
qm clone 501 106 --name ubuntu-vm02Apply the Cloud-Init Config
Reference the YAML file stored in your snippets folder:
qm set 106 --cicustom "user=local:snippets/cloud-init-config.yaml"This tells Proxmox to use the cloud-init config from /var/lib/vz/snippets/cloud-init-config.yaml.
Configure Networking
For static IP:
qm set 106 --ipconfig0 ip=10.160.0.61/24,gw=10.160.0.1For DHCP:
qm set 106 --ipconfig0 ip=dhcpStart the VM
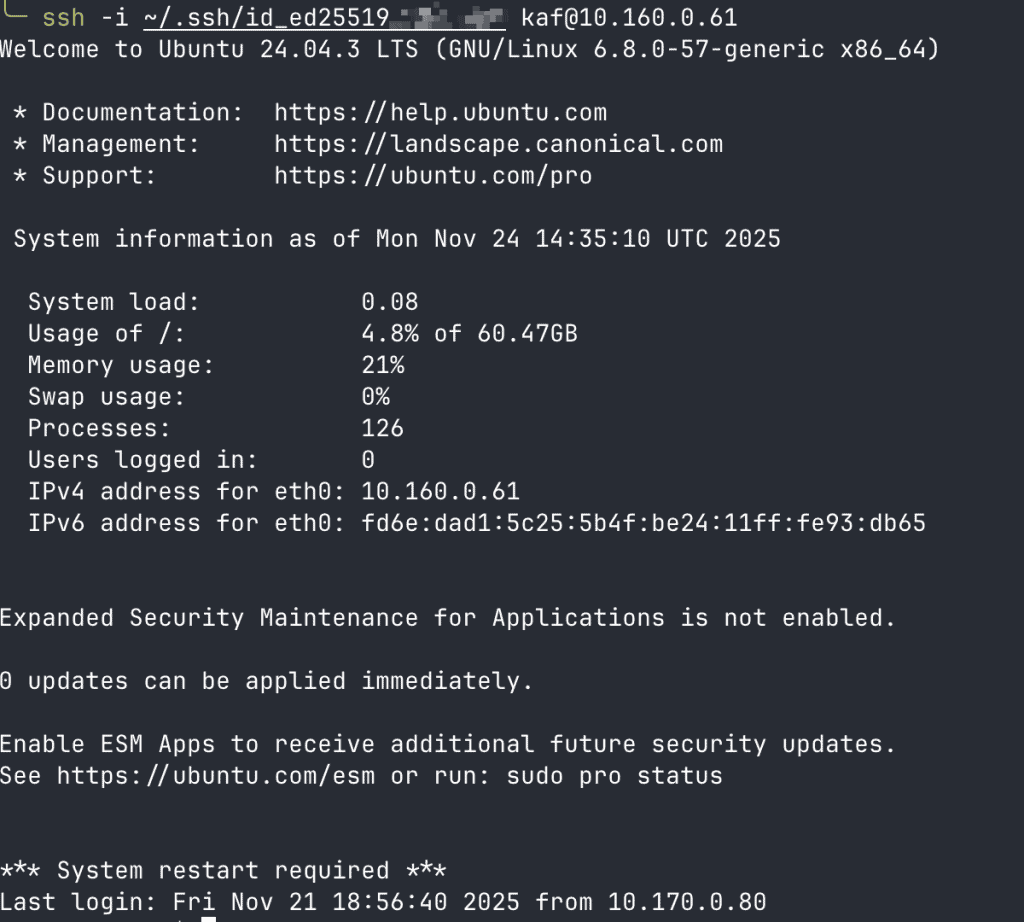
qm start 106That’s it! Cloud-init will run on first boot and configure:
- SSH hardening (no root login, no password auth)
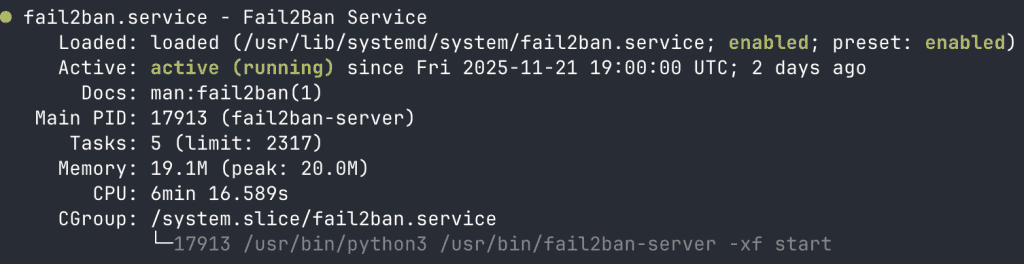
- Fail2Ban (brute-force protection)
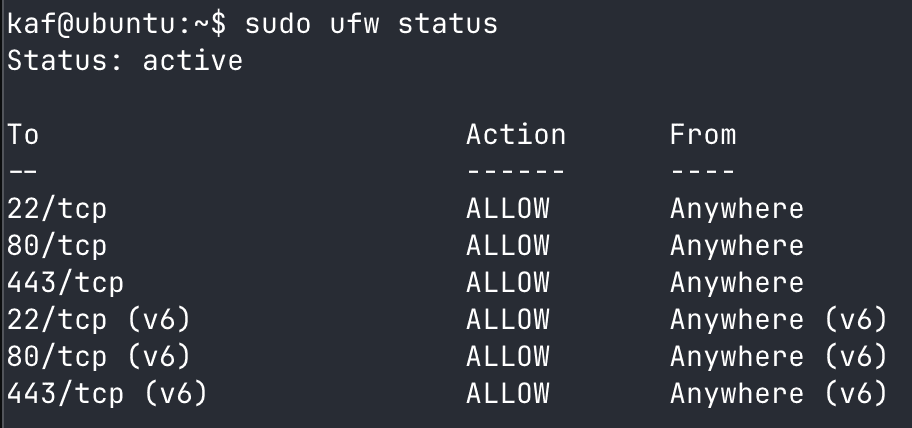
- UFW firewall (allows SSH, HTTP, HTTPS)
- Docker (latest version with proper logging)
- User with sudo access and SSH key authentication
Verify Docker

Verify Fail2Ban is Running
Verify UFW Firewall Rules
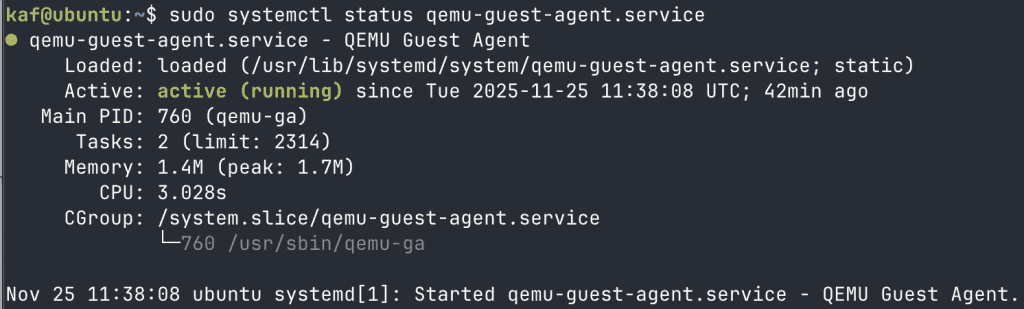
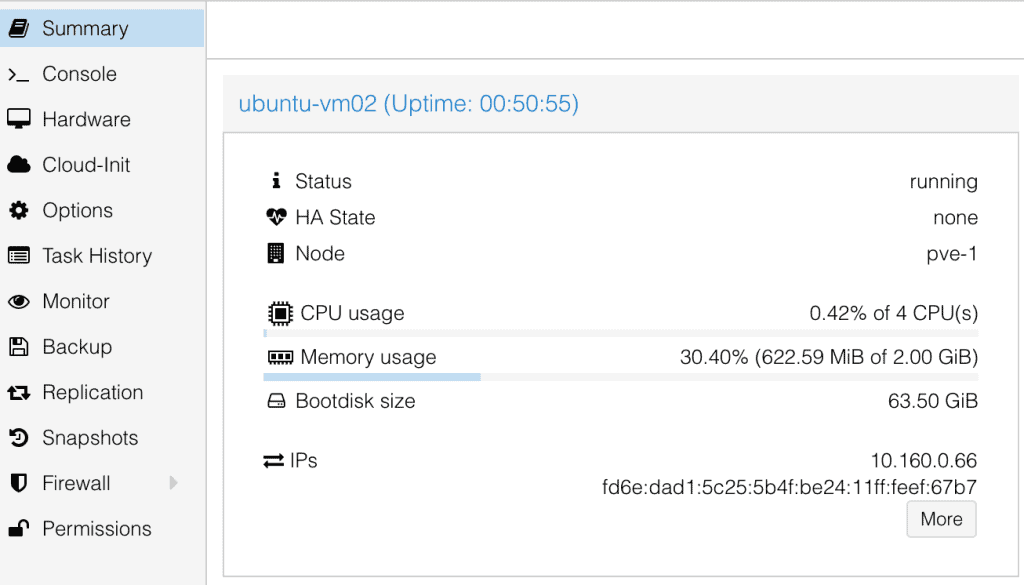
Verify QEMU Guest Agent
Troubleshooting
If something doesn’t work as expected, SSH into the VM and check the logs.
To check for errors:
sudo cat /var/log/cloud-init.log | grep -i errorTo see the last 100 lines of output:
sudo tail -100 /var/log/cloud-init-output.log
Why -cicustom is Better
Compared to the NoCloud ISO approach:
- Faster: No need to generate ISOs, just reference a file
- Reusable: Same YAML for multiple clones
- Maintainable: Update one file, all new clones use the latest config
- Cleaner: No ISO files cluttering your storage
- Flexible: Mix and match different YAML templates for different VM roles
Production-Ready Out of the Box
Your VMs are locked down from day one:
- SSH keys only (no password logins)
- SSH hardening config applied
- Fail2Ban running to prevent brute-force attacks
- UFW firewall enabled
- Docker installed and ready to use
All automated. No manual setup needed.
I use this in my own homelab for quickly spinning up test environments, production servers.
Building More Automation?
I recently started a Skool community called Build & Automate dedicated to infrastructure and automation. Whether you’re provisioning VMs, building Docker stacks, automating workflows with n8n, or managing cloud infrastructure, the community is a place to solve these problems together.
Related
Automatiser bilagsføring med Fiken API og Claude Code
Jeg videresendte kvitteringer til Fiken-inboksen og lot dem ligge. Så satt jeg en kveld i måneden og førte dem manuelt: finn leverandøren, velg konto, velg MVA-kode, last opp PDF-en. Fire klikk, tretten ganger. Så skrev jeg en Claude-skill som gjør det via Fiken API-et.
Build a Self-Healing AI Content Agent with Claude Agent SDK
Write a post, format it for X, reformat for Bluesky, render a video, upload to YouTube, cross-post to Instagram. Repeat daily. That was 2-3 hours of my day, so I built a self-healing AI content agent that does all of it. It runs 24/7 on a Mac…
Automate Your Blog Publishing in 2026: From Draft to Live in One Command
Blog automation saved me 15-20 minutes per post. The manual version went like this: write in your editor, open WordPress, paste and reformat, upload a featured image, configure SEO metadata, hit publish. Three or four posts a week adds up to hours of clicking. So I built a system that takes a markdown…